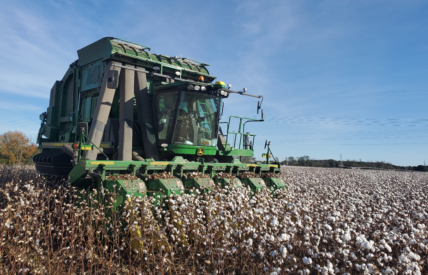
Cotton harvest is a race against the calendar. Once bolls open, quality starts slipping with every rain, wind event, and day of delay. The last thing any grower wants is a cotton picker parked in the shed with a failed bearing or a plugged row unit while the crop sits waiting in the field.
The best defense against harvest-time breakdowns is a thorough, organized equipment check well before the season begins. A good checklist keeps you from overlooking small problems that grow into big ones, and it gives you time to order parts, schedule repairs, and train operators without the pressure of a ticking clock.
This guide walks you through a practical cotton harvest prep checklist, system by system. Use it to inspect your picker, plan your parts orders, and head into the season with a machine you can trust.
Step 1: Inspect the Row Units From Front to Back
The row units do the real work of harvesting, so they deserve the most attention on your checklist. Each unit contains spindles, doffers, moistener pads, pressure doors or plates, and grid bars that must work together to pull lint cleanly from the plant. Wear in any one of these parts reduces picking efficiency and puts extra stress on the others.
Start by cleaning each row unit thoroughly. Built-up lint, gum, and plant residue can hide cracks, bends, and worn surfaces. Once the units are clean, work through each component methodically and record what you find.
Row Unit Checklist
- Spindles: Check for dull or rounded barbs, bending, heat discoloration, and looseness in the spindle bar
- Spindle bushings and gears: Look for excess play, chipped teeth, and uneven wear
- Doffers: Inspect for cracked, glazed, or uneven pads and confirm proper clearance to the spindles
- Moistener pads: Replace pads that are stiff, torn, frayed, or missing
- Pressure doors or plates: Check for bends, worn springs, and consistent tension
- Grid bars: Look for broken, bent, or missing bars and secure mounts
- Stalk lifters and shoes: Inspect for wear that could cause the unit to miss low bolls
Pro Tip
Replace high-wear items such as spindles, doffers, and moistener pads in matched sets whenever possible. Mixing worn and new parts on the same drum can create uneven performance and shorten the life of your new components.
Step 2: Check the Drive System and Rotating Components
Your picker’s drive system transfers power to the row units, fans, and conveying components. Bearings, gears, gearboxes, belts, chains, and sprockets all wear gradually, and failures in this system often happen at the worst possible moment. A careful inspection now can prevent a long repair later.
Run the machine at operating speed in the yard with all shields in place and listen carefully. Grinding, squealing, knocking, or rhythmic clicking are all clues that something is worn. After a short run, shut down safely and feel bearing housings for excess heat.
Drive System Checklist
- Bearings: Listen for noise, check for heat, and test for play by hand with the machine safely locked out
- Gearboxes: Check oil levels, look for leaks, and inspect for metal particles in the oil
- Belts: Look for cracks, glazing, fraying, and proper tension
- Chains and sprockets: Check for stretch, stiff links, and hooked or worn sprocket teeth
- Drive shafts and U-joints: Inspect for wobble, worn splines, and damaged shields
- Slip clutches: Confirm proper function and adjustment
Why It Matters
A single failing bearing can damage shafts, housings, and gears if it is left in service too long. Replacing a bearing during the off-season is a simple job. Replacing a bearing, shaft, and gear in the middle of harvest is an expensive and time-consuming repair.
Step 3: Service the Hydraulics and Engine
Modern cotton pickers rely heavily on hydraulics to drive row units, lift heads, operate baskets or module builders, and steer the machine. The engine powers it all. Both systems need fresh fluids, clean filters, and leak-free connections to perform reliably through long harvest days.
Begin with a full fluid and filter service according to your operator’s manual. Then inspect hoses and fittings closely, paying special attention to areas where hoses flex, rub, or sit near heat sources.
Hydraulic System Checklist
- Change hydraulic oil and filters at recommended intervals
- Inspect hoses for cracking, abrasion, bulging, or soft spots
- Check fittings, seals, and cylinders for leaks or weeping
- Test hydraulic pumps and motors for noise or slow response
- Confirm head lift and basket or module builder functions operate smoothly
Engine Checklist
- Change engine oil, oil filter, and fuel filters
- Replace or clean air filters, which clog quickly in dusty cotton conditions
- Inspect the cooling system, including radiator screens, coolant level, and hoses
- Check belts, tensioners, and pulleys on the engine accessory drive
- Test batteries, terminals, and the charging system
Fire Prevention Reminder
Lint, dust, and oil create serious fire risk around hot engine and exhaust components. Clean the engine compartment thoroughly, fix any oil or fuel leaks, and make sure your fire extinguishers are charged and easy to reach.
Step 4: Evaluate the Air System, Basket, and Module Builder
Once cotton leaves the row units, the air system carries it to the basket or onboard module builder. Leaks, worn fan components, or damaged ducts reduce airflow, which can lead to plugging and slower harvest speeds. Basket and module builder components also take a beating every season.
Inspect the fan, ducts, and doors for damage, then check the components that pack and handle cotton. A well-sealed, smoothly operating system keeps cotton moving and reduces stops in the field.
Air System Checklist
- Inspect fan blades, housings, and bearings for wear, cracks, or imbalance
- Check ducts and air chutes for holes, dents, loose seams, and gaps
- Make sure door seals and grates are intact and secure
- Clear any trapped lint or debris from the airflow path
Basket and Module Builder Checklist
- Inspect compactor augers, belts, and rollers for wear
- Check module wrap mechanisms and wrap supply, if applicable
- Look for worn or damaged floor chains, conveyors, and slats
- Test sensors, switches, and hydraulic functions for proper operation
- Confirm unloading and dumping functions work smoothly and safely
Step 5: Test the Cab, Electronics, and Safety Equipment
Today’s cotton pickers are packed with monitors, sensors, guidance systems, and yield mapping tools. When electronics fail, operators may lose visibility into machine performance or be forced to stop entirely. Long harvest days also make operator comfort and safety a top priority.
Power up the machine and walk through every display, warning light, and control. Update software and firmware before the season so you are not troubleshooting compatibility issues in the field.
Electronics Checklist
- Update monitor, guidance, and yield mapping software
- Test row unit sensors, plug sensors, and moisture sensors
- Inspect wiring harnesses for chafing, rodent damage, and loose connectors
- Calibrate yield monitors and moisture systems
- Confirm GPS receivers and auto steer systems are working correctly
Cab and Safety Checklist
- Replace cab air filters and check the HVAC system
- Test lights, flashers, horn, and backup alarms
- Inspect mirrors, windows, and wipers
- Confirm all safety shields and guards are in place
- Stock the cab with fire extinguishers, a first aid kit, and basic tools
- Review safety procedures with every operator, including lockout steps for clearing plugs
Step 6: Build Your Parts List and Order Early
After your inspection, turn your notes into a clear parts list organized by system and priority. Separate must-replace items from parts that can wait another season, and include a small inventory of common wear items to keep on hand during harvest. Spindles, moistener pads, doffers, belts, hoses, and filters are all smart items to stock.
Timing matters. Parts demand spikes right before harvest, and waiting until the last minute can mean backorders, rush shipping fees, and lost days in the field. Ordering early gives you time to confirm fitment, complete installation, and test the machine before the crop is ready.
Smart Parts Sourcing Tips
- Record your machine’s model and serial number before ordering
- Use OEM part numbers to cross-reference compatible replacements
- Compare quality aftermarket options alongside OEM parts to stretch your budget
- Ask suppliers about stock levels, shipping times, and warranty coverage
- Keep a harvest emergency kit of the parts you replace most often
If you run a Module Express or another Case IH model, working with a supplier who specializes in cotton equipment makes the process much easier. When you find Case IH cotton picker replacement parts from a trusted source, you can get the right fit, reliable performance, and expert guidance on what your machine needs. Quality aftermarket parts can offer strong value, especially when you are replacing full sets of high-wear components.
Frequently Asked Questions
When should I start preparing my cotton picker for harvest?
Begin with a full inspection soon after the previous harvest ends. Then do a final walkthrough 6 to 8 weeks before the new season, so you have time to order parts and finish repairs.
What are the most important parts to inspect before harvest?
Focus first on the components that wear fastest:
- Spindles, bushings, and spindle gears
- Doffers and moistener pads
- Bearings, belts, and chains
- Hydraulic hoses and fittings
- Air filters and fan components
How can I reduce the risk of a cotton picker fire?
Clean lint and debris from the engine compartment daily, repair oil and fuel leaks promptly, and keep charged fire extinguishers on the machine. Blow off hot areas regularly during harvest.
Should I keep spare parts on hand during harvest?
Yes. A small supply of high-wear parts such as moistener pads, spindles, belts, hoses, and filters can turn a multi-day breakdown into a quick fix in the field.
Are aftermarket parts a good choice for Case IH cotton pickers?
Quality aftermarket parts from a reputable supplier can match original fit and function at a competitive price. Always confirm compatibility with your model and serial number before ordering.
How often should I calibrate my yield monitor?
Calibrate before each harvest season and again if crop conditions, varieties, or moisture levels change significantly. Accurate calibration gives you reliable data for future decisions.
What should I do if I find a problem I cannot fix myself?
Schedule service with a qualified technician as early as possible. Shops get busy right before harvest, so booking ahead helps you avoid long waits.
Start Your Harvest Prep Today
A reliable cotton harvest is built in the off-season. Working through your picker system by system helps you catch worn parts early, plan repairs on your own schedule, and avoid the costly delays that come with mid-season breakdowns. The time you invest now pays off in cleaner picking, fewer stops, and better fiber quality.
Use this quick summary to keep your prep on track:
- Clean and inspect every row unit, replacing worn spindles, doffers, and moistener pads
- Listen for drive system noise and replace failing bearings, belts, and chains
- Service hydraulics and the engine, and fix leaks before they become fire hazards
- Seal the air system and test the basket or module builder
- Update electronics, calibrate monitors, and stock safety equipment
- Build your parts list and place orders well before the rush
If your checklist turns up components that need replacing, do not wait until the crop is open. Find Case IH cotton picker replacement parts early, get them installed, and give your machine a full test run. With a well-prepared picker, you will be ready to make the most of every day in the field.