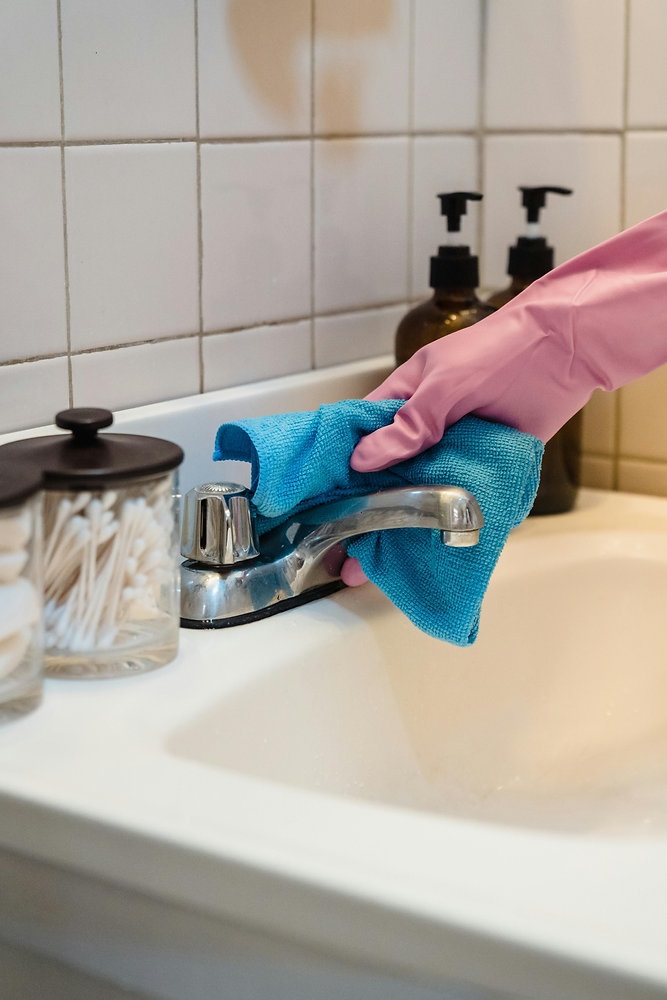
A bathroom can look clean from the doorway while still holding residue in the narrow places that ordinary wiping tends to pass over. The sink may shine, the mirror may be clear, and the center of the floor may have been mopped, yet buildup can remain around faucet bases, shower tracks, toilet hardware, grout joints, cabinet edges, and wall-to-floor transitions.
These areas become dirty for different reasons.
Some collect residue because hands touch them repeatedly. Others sit directly in the path of water. Floor edges and fixture gaps gather hair and fine debris because larger cleaning tools do not reach them easily.
That distinction matters. Detail cleaning should not mean scrubbing every small surface in the bathroom. It should mean identifying where residue is forming, why it is collecting there, and which method fits the material.
The following seven signs show where a closer pass may be worthwhile.
1. Faucet Bases Have Developed a Cloudy or Crusted Ring
The narrow line where a faucet meets the sink or countertop receives water almost every time the fixture is used.
Soap, toothpaste, grooming products, and mineral residue can collect there as droplets dry.
At first, the buildup may appear as a faint cloudy ring. Later, it can become more noticeable around the rear of the faucet or beside handles where an ordinary cloth does not fit easily.
Use a soft cloth or another non-abrasive tool sized for the gap.
Choose the cleaning method according to both surfaces involved. A faucet finish and the countertop surrounding it may have different care requirements.
Natural stone, coated metal, ceramic, engineered surfaces, and decorative finishes should not automatically receive the same product.
Separate Residue From Recurring Water
After the area is cleaned and dried, watch what happens next.
If moisture reappears around the faucet base without normal sink use, the problem may not be leftover grime.
A short note such as “residue cleaned; check if water returns around fixture base” gives Alto Cleaning Services a clear description of the cleaning condition without turning a possible plumbing concern into a cleaning claim.
Persistent moisture deserves investigation at its source.
Cleaning should remove what has accumulated on the surface, not hide evidence of a leak.
2. Shower Door Tracks Hold Dark or Sticky Material
Sliding shower doors create narrow channels that are easy to miss during ordinary shower cleaning.
Hair, dust, soap residue, and water can collect in the lower track.
Over time, those materials combine and become harder to lift with a quick wipe.
Begin by removing loose material while the track is reasonably dry.
A narrow vacuum attachment or soft brush may help with accessible corners.
Once loose debris is gone, treat the remaining film using a method appropriate for the track material.
Avoid pouring large amounts of water into the channel.
If the design includes drainage openings, keep them unobstructed according to manufacturer guidance rather than pushing debris farther inside.
A shower can have clean glass and walls while the lower track still gives the area an unfinished appearance.
3. The Floor Behind the Toilet Looks Different From the Open Floor
The space behind and beside a toilet receives less direct cleaning than the center of the room.
It is narrow, partly hidden, and difficult for full-size floor tools to reach.
Hair, lint, dust, and small splashes can gather there gradually.
Inspect the area before adding moisture.
If loose debris is present, remove it first with an appropriate vacuum tool or other dry method. Mopping directly over hair and dust may simply move the material toward the toilet base.
Once the loose layer is gone, clean the accessible flooring according to its material.
Look at the exterior of the toilet base at the same time.
If discoloration remains after ordinary residue has been removed, do not assume stronger scrubbing is required. Some marks may come from flooring wear, old caulk, or another condition unrelated to surface dirt.
Read the Bathroom by the Route the Residue Took
Small dirty areas become easier to understand when they are grouped by how the buildup arrived.
Hand contact leaves oils and product residue on handles, cabinet pulls, toilet hardware, and door areas.
Water movement creates rings around faucet bases, shower channels, lower seams, and places where droplets repeatedly dry.
Perimeter settling leaves hair, lint, and fine dust beside toilets, along baseboards, beneath vanity edges, and in corners where broad tools skim past.
A request for cleaning services atlanta becomes much more specific when it describes those three residue paths instead of simply asking for “extra bathroom cleaning.” Contact marks, runoff buildup, and settled edge debris each point to a different set of surfaces and tools.
The bathroom itself shows where the work should go.
That makes the scope easier to define without treating every fixture, wall, and tile as equally dirty.
4. Grout Lines Are Darker Near Corners and Fixtures
Tile can look clean while nearby grout begins showing a darker line.
This often happens around shower corners, tub edges, sink areas, and floor perimeters because textured grout catches residue differently from smooth tile.
Compare several areas.
If open grout lines look normal but the corners beside a fixture are noticeably darker, concentrate on those sections rather than scrubbing the entire tiled surface.
Use a method suitable for the grout and adjoining tile.
Avoid very abrasive tools unless the material manufacturer specifically permits them.
Cracked, missing, or crumbling grout is not a cleaning problem.
Once the material itself is failing, more scrubbing may only make the damaged section worse.
5. Toilet Hinges and Mounting Areas Look Dirty Up Close
Toilet seats and bowls usually receive frequent cleaning.
The hinge area may not.
Look closely around the seat mounts, lid edges, and accessible hardware.
Dust and residue can collect in small gaps that are difficult to see from standing height.
Use separate cleaning materials for the toilet area and follow the manufacturer’s guidance for any components that are intended to be removed.
Do not force hinges, caps, or fittings apart simply to reach a hidden spot.
A small brush or narrow cloth can often reach accessible surfaces without dismantling the hardware.
If a seat or hinge is loose, treat that as a hardware issue rather than trying to solve it through cleaning.
6. Cabinet Handles and Lower Edges Feel Sticky or Dull
Bathroom cabinets do not collect cooking grease, but they still receive plenty of hand contact.
Lotions, cosmetics, hair products, soap, and skin oils can transfer onto knobs, pulls, and the surrounding cabinet surface.
The lower edge may collect a different mixture of dust, hair, and occasional splashes.
Check the handle first.
Then inspect the narrow area immediately around it and the bottom edge of the cabinet.
Use a product suited to the finish.
Painted wood, laminate, veneer, coated composite materials, and finished timber may respond differently to moisture.
Keep clothes well controlled around seams.
The goal is to lift contact residue without allowing excess liquid to sit along cabinet joints.
7. Floor Edges Stay Gray After the Center Has Been Mopped
Floor tools naturally cover open space better than tight perimeters.
That is why a bathroom floor can look clean in the middle while still carrying a dull line around:
- Baseboards
- Vanity sides
- Door edges
- Toilet surroundings
- Corners
- Floor transitions
Inspect those areas after the center of the floor is finished.
If hair or grit remains, use a crevice attachment or another appropriately sized dry-cleaning tool first.
Then address any remaining floor residue using a method appropriate for the material.
Do not keep remapping the entire room because the problem sits within one inch of the wall.
Targeting the perimeter is faster and avoids unnecessary moisture on sections that are already clean.
Treat Caulk as a Material With a Stopping Point
Caulk around tubs, showers, counters, or other wet areas can collect ordinary surface residue.
That residue may respond to gentle cleaning.
Cracking, peeling, shrinking, or separating caulk is different.
No amount of wiping will restore a failed joint.
Repeated scrubbing can make loose material deteriorate further.
Inspect the line after surface residue has been removed.
If the caulk itself is damaged, move the issue from the cleaning list to the maintenance list.
That distinction prevents a detail-cleaning session from becoming an attempt to repair materials through stronger chemicals or more pressure.
Check Mirror Edges Without Flooding Them
The center of a bathroom mirror gets most of the attention because fingerprints and water spots are easy to see.
The lower corners and edges can develop a thin haze from toothpaste mist, grooming products, or sink spray.
Look at the mirror from an angle.
Side lighting may reveal residue that is difficult to see straight on.
Apply cleaner to the cloth rather than soaking the glass near its edges.
Avoid allowing liquid to run behind the mirror or backing.
If a cloudy area appears to be beneath the reflective surface rather than on top of it, continued wiping will not solve the problem.
Inspect the Counter-to-Wall Seam Separately
The narrow seam behind a bathroom sink can collect dust, dried droplets, and product residue.
A broad counter wipe may pass directly over it.
Use a soft cloth or appropriately sized tool to reach the line without digging into caulk or sealant.
Avoid sharp scrapers.
If the seam is cracked or separating, document it as maintenance rather than continuing to work at it.
This area illustrates why detail cleaning is often about tool size rather than cleaning strength.
The residue may be ordinary; the problem is simply that the usual cloth never reaches it properly.
Use Smaller Tools Before Stronger Products
Tight bathroom areas often tempt people to increase scrubbing pressure.
A better first question is whether the tool fits the space.
A large sponge may not reach behind a faucet.
A floor mop cannot clean closely beside a toilet.
A broad cloth may glide over the top of a narrow track.
Depending on the material, more suitable options may include:
- Small soft brushes
- Crevice vacuum attachments
- Narrow microfiber tools
- Soft cloths folded to fit an edge
Avoid metal scraping tools or harsh abrasives unless specifically approved for the surface.
Precision usually solves more detail-cleaning problems than force.
Work in an Order That Matches Where Debris Falls
Begin with areas above the counter and floor.
That may include mirror edges, shelving, upper fixture surfaces, and higher trim.
Move down toward:
- Counters and faucet areas
- Cabinet fronts and hardware
- Toilet details
- Vanity bases and lower trim
- Floor edges
- The main floor
This order keeps loosened dust and hair from falling onto sections that have already been completed.
It also prevents unnecessary repeat work without requiring every bathroom surface to be cleaned during the same pass.
Build a Detail Rotation From What Actually Became Dirty
After the seven problem areas have been checked, notice which ones genuinely needed work.
Perhaps the faucet base and shower track had obvious residue, while the grout and cabinet handles were already fine.
That information should shape the next detail pass.
There is no reason to treat every item on this list at the same frequency.
A note for Alto Cleaning Services might identify two or three recurring trouble spots rather than repeating all seven categories each time.
One bathroom may repeatedly collect debris around the toilet and floor perimeter.
Another may show more buildup around shower hardware and vanity edges.
The rotation should follow the room’s actual pattern.
Do Not Let Detail Cleaning Turn Into Fixture Disassembly
More access is not always better.
Bathroom cleaning should remain focused on normal, safely reachable surfaces.
Do not dismantle faucets, toilet hardware, shower-door mechanisms, electrical fixtures, drains, or other components simply to chase a small amount of hidden residue.
If a component needs to be removed for repair or maintenance, that is a different task.
The purpose of detail cleaning is to reach commonly missed exterior surfaces with better tools and closer inspection.
It is not to take fixtures apart.
Stop Once the Remaining Problem Is Damage
One of the easiest ways to overclean a bathroom is to keep working after the removable residue is already gone.
A dark grout section may actually be stained.
A dull faucet finish may be worn.
A cabinet edge may have chipped paint.
A floor transition can have physical damage.
A cloudy mirror edge may have deteriorated behind the glass.
After reasonable cleaning, evaluate what remains before reaching for a stronger product.
Some imperfections need repair, refinishing, or replacement rather than another cleaning attempt.
Recognizing that point protects finishes and keeps the job realistic.
Detail Cleaning Should Follow Evidence, Not a Huge Checklist
A bathroom usually needs closer cleaning when residue begins appearing around the edges of normal maintenance.
Cloudy faucet bases, dirty shower tracks, debris behind the toilet, darkened grout, neglected toilet hardware, sticky cabinet edges, and gray floor perimeters each reveal a specific kind of missed buildup.
Look at how that residue formed.
Was it transferred by hand? Carried by water? Left behind where larger cleaning tools could not reach?
Once the cause is clear, the solution becomes more targeted.
Use smaller tools for narrow areas, material-safe methods for fixtures and finishes, and a cleaning order that prevents debris from falling onto completed surfaces. Keep damaged grout, failing caulk, loose hardware, leaks, and other repair concerns outside the cleaning task.
That approach gives the bathroom a more finished appearance without turning every weekly clean into an exhaustive detail project.