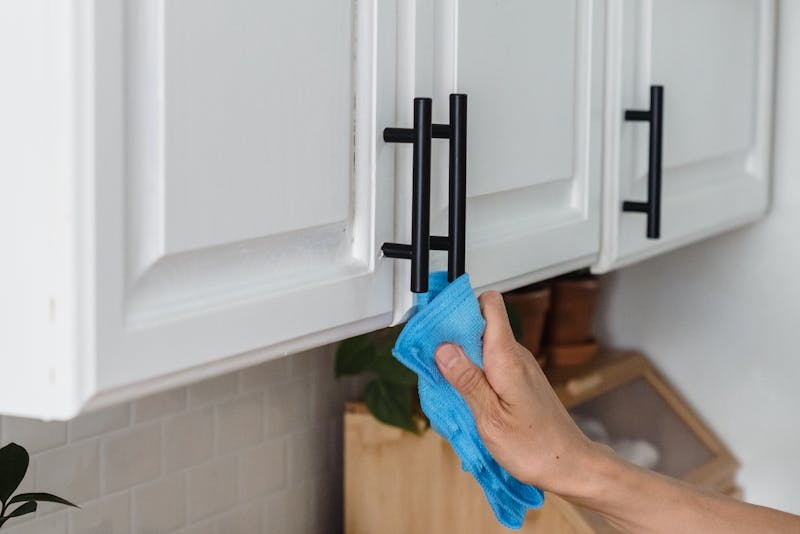
Painted cabinets can brighten a kitchen or bathroom, but the finish also makes certain kinds of grime easy to notice. Fingerprints gather around pulls, cooking residue settles on doors near the range, splashes mark lower panels, and dust collects along molding, recessed details, and upper edges.
The challenge is not simply getting those marks off.
Painted surfaces can lose sheen, develop dull patches, soften around worn edges, or show permanent damage if they are scrubbed too hard or exposed to unsuitable cleaners. A method that seems harmless on one cabinet may react differently on another because paint type, age, finish quality, and previous wear all affect how the surface responds.
For that reason, painted cabinet cleaning should be gradual. Remove loose dust first, test unfamiliar methods, use limited moisture, and stop escalating once the remaining problem appears to be damage rather than residue.
Start by Checking the Finish Before Cleaning the Dirt
Before choosing a product, look closely at the cabinet surface.
Ask a few basic questions:
- Is the paint glossy, satin, matte, or difficult to identify?
- Does the surface feel smooth or slightly chalky?
- Are there chipped corners?
- Is paint worn thin around handles?
- Are lower edges swollen or peeling?
- Does the finish look recently painted or noticeably aged?
Those observations matter because a durable enamel may tolerate more routine wiping than an older or softer coating.
If the finish already looks fragile, use extra caution.
Cleaning should not become a test of how much rubbing the paint can survive.
Remove Loose Dust From Grooves and Upper Edges
Dry debris should come off before any liquid is introduced.
Painted cabinets collect dust in places that broad wiping often misses:
- The top edge of doors
- Decorative grooves
- Recessed panels
- Crown or trim details
- Hinge-side edges
- Cabinet tops
- The narrow lip beneath countertops
Use a clean microfiber cloth, soft duster, or suitable vacuum attachment.
Work from upper areas downward so loosened particles do not fall onto sections that were already finished.
Removing dust first also makes the remaining grime easier to identify. What looked like a dark streak may disappear completely once the dry layer is gone.
Test the Method Where a Reaction Will Not Be Obvious
Painted finishes vary enough that testing is worth the extra minute.
Choose a small, inconspicuous area such as the inside edge of a door.
Apply a small amount of the planned cleaning solution to a soft cloth rather than spraying the cabinet directly.
Wipe gently, then inspect the surface after it dries.
Stop if you notice:
- Color transfer onto the cloth
- Dulling
- Increased shine
- Softening
- Tackiness
- Discoloration
A cleaner can remove grime and still be wrong for the finish.
If Carolina Dream Clean is already scheduled for general kitchen cleaning, marking any cabinet section that reacted poorly during a test can help keep that surface separate from ordinary wipe-down areas.
A sensitive finish should be identified before the rest of the doors are treated.
Use the Mildest Method That Removes the Mark
Routine fingerprints and light residue usually do not justify an aggressive degreaser.
Start with a mild method suitable for the painted surface.
Use a soft microfiber cloth that is damp rather than wet.
Work on one small section at a time.
Then dry the surface with a separate clean cloth where appropriate.
Avoid spraying directly onto doors.
Liquid can run toward hinges, seams, panel joints, unfinished edges, and lower corners where it may remain longer than expected.
If the mark comes off with a gentle pass, stop there.
There is no benefit in increasing product strength after the surface is already clean.
Treat Handles as Contact Zones
Cabinet pulls and the paint surrounding them usually get dirty before the center of the door.
Hands transfer cooking oil, lotion, food residue, and ordinary skin oils.
That buildup often forms a darker halo around frequently used handles.
Clean the hardware according to its own material.
Then address the painted section immediately around it with a method suited to the cabinet finish.
Do not attack the dark area with repeated hard rubbing.
Paint can become polished by friction, leaving a shiny patch that is more obvious than the original grime.
A darker mark does not always mean more pressure is required.
Sometimes it simply needs more time with a mild method.
Separate Cooking Grease From Ordinary Fingerprints
Cabinets near the stove usually face a different problem from cabinets across the room.
Airborne grease can settle onto the painted surface and gradually trap dust.
The result may feel tacky even when the door does not look heavily stained.
Begin gently.
Use a product compatible with the finish and allow any label-directed contact time before wiping.
If the grease is concentrated around one edge or handle, treat that location rather than coating the full door.
Several controlled passes are safer than one abrasive attempt.
Once the residue releases, dry the area as appropriate so moisture does not remain around seams.
Do Not Treat Every Cabinet as Equally Dirty
A kitchen can contain twenty doors while only six show meaningful buildup.
Look at the pattern.
Cabinets closest to the range may carry oily film.
Doors beside the trash pull-out may have food marks near the lower edge.
A pantry door may show fingerprints around the handle but little else.
Upper cabinets across the room may need nothing beyond dust removal.
Cleaning by condition protects the finish and saves time.
It also reduces the number of painted surfaces exposed unnecessarily to moisture or cleaning products.
Build a Finish-Risk Map Before Cleaning Every Door
Painted cabinetry becomes easier to handle when the doors are divided by condition rather than location.
Think of three groups.
Low-risk areas have intact paint and light removable grime.
Caution areas show older paint, worn handle zones, uncertain sheen, or stubborn residue that needs a tested method.
Stop areas include peeling paint, swelling, exposed substrate, loose veneer, bubbling, or other signs that the surface itself may be failing.
That simple map changes how the work is approached.
If you are arranging cleaning services charlotte nc, describe the cabinet condition in those terms rather than asking for every painted door to receive the same treatment. Intact surfaces can be handled normally, questionable finishes can be approached cautiously, and damaged sections can be left for repair instead of being scrubbed harder.
The cabinet face may look like one continuous finish, but its condition can change from door to door.
Avoid Abrasive Pads and Gritty Products
A rough sponge may remove a stubborn mark quickly, but it can also alter the paint.
Possible damage includes:
- Fine scratches
- Dull patches
- Bright shiny spots
- Loss of color
- Worn edges
Use soft non-abrasive materials unless the cabinet manufacturer specifically recommends something else.
If a mark remains, reassess it before increasing pressure.
It could be staining, worn paint, heat damage, or another permanent change.
Painted cabinetry usually responds better to patience than force.
Keep Moisture Away From Seams and Corners
Broad painted faces may tolerate careful wiping better than their edges.
Corners and seams often contain thinner paint or exposed material beneath the finish.
Keep cloths well wrung out.
Do not allow liquid to run into panel joints or collect beside hinges.
Dry any visible moisture promptly.
Pay particular attention to lower door edges, where drips can settle.
If a cabinet door has already begun swelling around a seam, more damp cleaning is unlikely to help.
That condition should be assessed as material damage.
Inspect Lower Cabinets for a Different Kind of Grime
Lower doors deal with traffic that upper cabinets never see.
They may collect:
- Shoe marks
- Pet contact
- Food splashes
- Vacuum bumps
- Drips from counters
- Crumbs around toe-kicks
Inspect them separately.
Fresh splashes are usually easier to remove than marks that have dried repeatedly over several months.
Use a finish-safe method and keep moisture controlled near the lower edge.
If one door near the dishwasher or sink consistently shows more marks, it may simply need more frequent light attention than nearby upper cabinets.
Watch Sink Cabinets for Repeated Water Exposure
Cabinets beneath or beside sinks deserve special attention.
Water can drip down the door after handwashing or dishwashing.
A small splash that is wiped promptly may cause no problem.
Repeated moisture sitting along the lower edge is different.
Look for:
- Bubbling paint
- Swelling
- Peeling
- Darkened seams
- Softened material
- Persistent dampness
If those signs appear, investigate the moisture source.
Cleaning can remove marks left by water.
It cannot correct a leak or restore damaged cabinet material.
Do not keep wiping a repeatedly damp surface without asking why it keeps getting wet.
Clean Cabinet Tops as Their Own Surface
Cabinets that stop below the ceiling create a broad horizontal ledge that can collect both dust and cooking residue.
Because the area is out of sight, buildup may remain there much longer than on cabinet fronts.
Start with dry debris.
If the remaining surface feels greasy, use a method appropriate for the cabinet-top material.
Do not assume the top is finished exactly like the visible doors.
Some cabinet constructions use different materials or coatings on surfaces that are not normally seen.
Use a stable step stool or another safe access method rather than standing on counters or chairs.
High cabinet cleaning should never require unsafe positioning.
Clean Toe-Kicks Without Using the Floor Product Automatically
Toe-kicks sit close to the floor, but they are still part of the cabinetry.
They may be painted, laminated, veneered, or finished differently from the flooring in front of them.
Vacuum loose crumbs, hair, and grit first.
Then wipe visible marks according to the toe-kick material.
Do not carry a floor-cleaning product onto the cabinet automatically.
The two surfaces may meet at the same edge while requiring completely different care.
This is especially important in kitchens where floor cleaners contain ingredients that are not intended for painted finishes.
Handle Decorative Grooves With Smaller Tools
Recessed doors and decorative molding create narrow places where grime can collect.
A broad cloth may skim over the surface while leaving residue in the groove.
Use a smaller soft tool that fits the profile.
A folded microfiber cloth or soft brush may work better than increasing pressure with a larger sponge.
Avoid sharp scraping tools.
The goal is to reach the shape of the cabinet, not to force dried material out by damaging the paint around it.
Tool size often matters more than cleaning strength.
Let the Cabinet Dry Before Judging the Result
A freshly wiped painted surface can look different while still damp.
Wait before deciding that another pass is necessary.
Moisture may temporarily change how light reflects from satin or matte paint.
Cleaner residue can also create a temporary haze.
Once the area dries, inspect it from different angles.
If the mark has disappeared, stop.
If it remains but the surface feels clean, consider whether you are looking at staining or finish wear instead of residue.
This pause can prevent unnecessary repeat cleaning.
Watch for Cleaner Film Around Frequently Wiped Areas
Cabinets can feel sticky even after grease has been removed.
Sometimes the remaining tackiness comes from cleaning product residue.
Follow product directions carefully, including any rinsing or finishing step.
Use a clean cloth rather than continuing with one already loaded with grime.
Allow the surface to dry fully before judging it.
If the tackiness disappears after the finishing step, further degreasing would only expose the paint to more product than necessary.
Do Not Chase Old Stains With Stronger Chemistry
Some painted cabinet marks become permanent.
Food dyes, repeated grease exposure, sunlight, heat, water damage, or years of contact can change the finish itself.
Once reasonable cleaning stops producing improvement, reassess the mark.
A stronger chemical may remove part of the paint before it removes the discoloration.
At that point, touch-up paint, refinishing, or repair may be more appropriate.
The stopping point protects the surrounding finish.
Knowing when to quit is part of good cleaning practice.
Use High-Contact Doors as Early Indicators
There is no need to inspect every cabinet constantly.
Choose a few doors that usually show grime first.
Good indicators might include:
- The door beside the range
- The cabinet below the sink
- A frequently used pantry door
- The trash pull-out
- A drawer beside the main prep area
If those surfaces remain clean, the rest of the cabinetry may not need attention yet.
If fingerprints and grease are beginning to appear there, a light cabinet pass may be worthwhile before buildup becomes harder to remove.
This condition-based approach is easier on painted finishes than frequent full-cabinet washing.
Keep a Note of the Doors That Need Different Treatment
Once you know how the paint behaves, record the exceptions.
Perhaps one older cabinet door has a fragile finish.
Maybe the sink base shows moisture wear.
A recently repainted section may have different care guidance from the original cabinetry.
Those distinctions are useful later.
A note for Carolina Dream Clean such as “avoid extra moisture on sink-base edge; finish worn near pantry handle” communicates far more than asking for every cabinet to be scrubbed equally.
It also reduces the chance of a damaged-looking area being mistaken for stubborn dirt during a future visit.
Keep Routine Care Light
Painted cabinets generally stay easier to manage when light buildup is handled before it becomes heavy.
That does not mean washing every door weekly.
Focus on visible condition.
Wipe a fresh food splash.
Handle fingerprints when they become obvious.
Remove grease from the doors nearest the cooking zone before dust has time to bond to it.
Leave clean cabinet fronts alone.
A light, selective approach exposes the finish to less moisture, less rubbing, and fewer products over time.
Protect the Finish by Knowing What Not to Clean
Painted cabinets require judgment as much as technique.
Loose dust can be removed.
Fingerprints can usually be wiped.
Cooking residue can often be loosened with a suitable mild method.
Water damage, peeling paint, chips, swelling, and worn finish are different.
Those conditions should not be treated as dirt simply because they make the cabinet look imperfect.
Start gently, test unfamiliar methods, control moisture, and use smaller tools for grooves and edges. Pay special attention to handles, stove-side doors, lower cabinets, sink areas, and cabinet tops, but only where the condition shows a reason for cleaning.
The safest cabinet routine is not the one that uses the strongest product.
It is the one that removes ordinary grime while leaving the paint looking exactly as it did underneath.