A vague creative brief can produce an impressive AI image and still leave a team with nothing it can use. “Make it modern” does not explain the audience, the message, the subject, or the space needed for a headline. Generating more versions only multiplies the unresolved decisions when nobody has defined what a successful image must do.
Nano Banana 2.1 offers text-based image creation and reference-image editing in a browser. A team can use that kind of workspace to explore visual directions and refine selected candidates. The surrounding workflow should turn a brief into explicit decisions, so the final selection is understandable to someone who did not watch every generation.

Give the Brief Four Jobs
The first job is communication. State what the audience should understand after seeing the image. A visual for a beginner’s workshop may need to feel approachable; a diagram-like illustration for an article may need to distinguish two ideas clearly. Neither objective is adequately described by “professional.”
The second job is content. Identify the main subject and anything that must be present or absent. If the image is fictional or illustrative, say so. If it depicts a real object, provide suitable reference material and identify the details that require verification.
The third job is composition. Specify the destination shape, focal point, and any area reserved for copy. The fourth is evaluation: name the visible conditions that will make the team accept or reject a candidate. A brief becomes actionable when another person can apply those conditions without asking the author to explain their taste.
Separate Exploration from Refinement
Exploration asks which direction deserves more work. Refinement asks how to improve a selected direction. Mixing the two creates confusing feedback: one person is discussing the color of an object while another still wants a different subject entirely.
During exploration, compare meaningfully different concepts. For an article about collaboration, a team might consider interlocking paper shapes, people working around a table, or several paths meeting at one point. These are alternative visual ideas, not minor changes to the same image.
Once a direction is selected, keep its defining choices stable. Change one significant issue per revision, such as subject placement or background complexity. The purpose is not scientific isolation; it is making ordinary review easier to follow.
A reviewable creative process preserves the reason for each major decision. The saved image alone cannot explain why an earlier, more decorative candidate was rejected.
A Four-Step Workflow from Brief to Image
The following process creates a small trail of decisions without turning a modest illustration task into a large documentation project.
Step 1: Write a One-Page Decision Brief
Record the audience, communication goal, primary subject, intended placement, and constraints. Add two acceptance questions. For example: “Does the central shape remain recognizable at article-card size?” and “Is there enough quiet space for the headline?” Use conditions that can actually be inspected.
Collect only relevant references and state what each one contributes. One may establish color, while another explains composition. Do not assume a reference grants permission to reuse protected material. If two references contradict each other, resolve that conflict before asking a generator to combine them.
Step 2: Explore Distinct Directions
Translate the brief into a few concise instructions, each representing a different concept. Keep the communication goal constant so the results can be compared meaningfully. Check the selected output format and displayed generation cost before starting each set.
For an abstract collaboration image, a sample direction could be: “Create a restrained editorial illustration of three blue folded-paper forms joining into one balanced structure. Use a pale background and leave clear space above. No lettering.” Treat this as a starting instruction, not a promise that the first result will meet the brief.
Step 3: Review Against the Brief
Place candidates side by side and discuss the acceptance questions before preferences. Does the image communicate the idea? Does its focal point survive at the intended size? Does any unexpected detail distract from the subject or introduce a meaning the team did not intend?
Choose one direction and write a specific revision note. “Reduce the background detail while preserving the three connected shapes” is more actionable than “make it cleaner.” If every candidate fails the communication goal, reconsider the concept rather than polishing a fundamentally unsuitable image.
Step 4: Refine, Approve and Package
Use the selected image as a reference when the workflow supports it, and request focused changes. Compare the revised candidate with the selected direction to catch unintended changes. When the image meets the acceptance questions, export it for the actual placement and review that export.
Package the final image with its brief, source references, settings, and a short approval note. Record any limitations, such as “illustrative concept, not an actual interface.” The next person should know which file to use, where it belongs, and which changes would require another review.
Worked Example: An Illustration for a Team Newsletter
Suppose a small organization needs a newsletter image about cooperation between departments. This is a hypothetical planning example, not a claim about a completed client project. The image will sit above a short headline, and it must remain legible in a narrow mobile column.
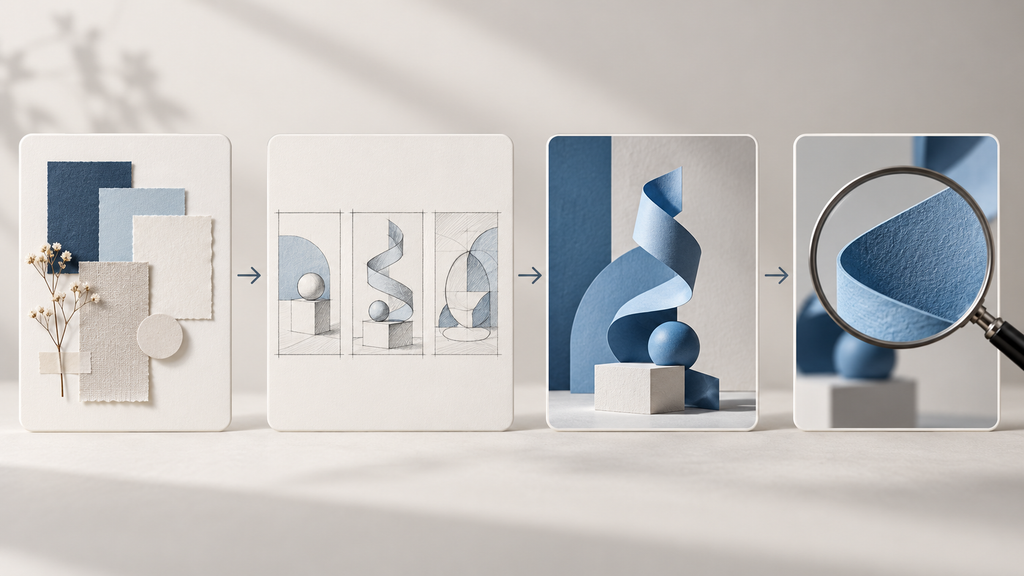
The brief defines the idea as “different contributions forming a coherent result.” The team explores three concepts: a crowded meeting scene, intersecting paths, and folded-paper forms joining together. The meeting scene is expressive but contains too many small details for the intended placement. The paths are clear but look like a travel map. The paper structure becomes the selected direction because its basic relationship is visible at a glance.
During refinement, the team asks for fewer background objects and more open space above the structure. If a revision turns three forms into an indistinct pile, it fails the acceptance question even if the lighting improves. The approved version retains a clear relationship between the shapes and leaves room for separately typeset copy.
The handoff note records the communication goal and explains that the forms are conceptual. It does not claim that the image was tested with readers or improved newsletter engagement. Those would require separate evidence. The documented decision is narrower: this candidate meets the team’s stated visual requirements.
AI Exploration vs Stock Search and Commissioned Illustration
This comparison focuses on how each approach supports an early brief, where judgment is required, and what makes final production different.
| Criteria | Nano Banana 2.1 concept workflow | Searching existing stock images | Commissioned illustration workflow |
| Starting Point | Written brief and optional references | Search terms and available catalog | Brief and discussion with illustrator |
| Main Strength | Exploring custom visual directions | Finding already visible finished options | Interpreting a nuanced communication goal |
| Iteration Method | Focused instructions and candidate review | Refine search or change selection | Feedback within an agreed process |
| Control | Needs verification after each revision | Limited to the available source | Negotiated detail and creative judgment |
| Best Use Case | Early concepts and modest illustrations | Familiar subjects with suitable imagery | Distinctive final editorial artwork |
| Main Limitation | Can misinterpret important relationships | Exact concept may be unavailable | Requires planning and a suitable budget |
Where This Process Helps
Small editorial teams can use it for article headers and newsletter illustrations. Their main benefit is a clearer path from a subject to a visual decision. They should still avoid imagery that looks like documentary evidence when the scene is invented.
Community groups can apply it to event concepts and educational materials. Simple acceptance questions help occasional contributors work together. The final artwork must still include accurate event details, readable typography, and any necessary explanation of an illustrative scene.
Freelance designers can use it to prepare options for a client discussion. The brief helps distinguish a rejected concept from a correctable detail. It also clarifies when the client is requesting a new direction rather than a minor revision to the selected image.
Keep the Claims Smaller Than the Evidence
An attractive concept does not prove audience comprehension, brand fit, or commercial performance. A team can judge whether an image follows a brief; demonstrating its effect on real viewers is another task. Keep those claims separate in internal presentations as well as public copy.
Likewise, do not mistake a preservation instruction for a locked design system. Generated revisions may alter shape, color, or relationships unexpectedly. A layered editing tool or an illustrator may be the better choice when exact typography, diagrams, or repeated elements require precise control.
The workflow is most useful when a team needs to explore ideas and can assign someone to make final judgments. A concise brief, a few distinct directions, and a recorded approval create a more dependable handoff than a large folder of unexplained images. The finished asset should arrive with enough context for the next person to use it correctly.